
Setting up your Raspberry Pi for the first time
Since you read this, you’re have probably bought a Raspberry Pi and are eager to get it up and running. We have tried to make a very simple step-by-step guide below to help you succeed.
What do you need?

On our table we have the following items to bring our empty Raspberry to life:
- One Raspberry Pi 2 Model B
- One micro USB power adapter for powering the Raspberry. Most standard 5 volt smartphone chargers would do. Ideally it should have capacity for 1.8 A or more.
- One MicroSD card (8GB recommended) and USB adapter for copying files to the card from you laptop.
- One USB keyboard
- One USB mouse
- One HDMI cable to plug your Raspberry into your TV or computer screen
- One laptop (in our case a Macbook Pro)
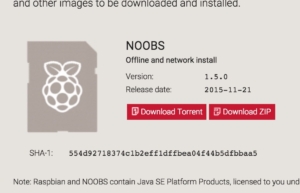
Start by downloading the operating system to your MicroSD card
Make sure your MicroSD card in empty and formatted as FAT32. Download the zip-file containing the operating system Noobs from this link (from www.raspberry.org) and save it to your laptop’s hard drive.
Unzip all the files and copy them to your MicroSD card.

Plugging in your MicroSD into your Raspberry to start up
Before plugging in your Raspberry to your power adapter, insert your MicroSD card, plug in your keyboard, mouse, and connect the HDMI cable between your Raspberry and your TV or screen.

Install the operating system
Now, plug in the power adapter and you should see the boot-up screen.
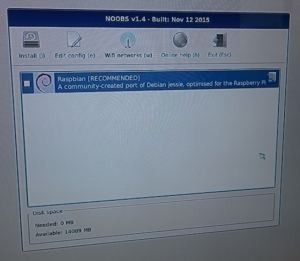
Click the check box for Raspian and click install. Then click Yes. The process of installing the operating system takes a while. Be patient, it’s worth it!
Setting up the basics
From here we set the time and location. Click on the menu in the upper left corner and select Preferences->Raspberry Pi Configuration.

If you select the tab Localisation, you can set your locale and timezone.

If you plug in an ethernet cable between your internet router and your Raspberry, you automatically get the correct time each time the Raspberry boots up. Having your Raspberry connected to the internet also enables you to get software updates and browse the internet from your Raspberry.
Where to go from here?
From here the possibilities are almost endless of what you can do with your Raspberry. We know, it feels a bit overwhelming. You can use it to create computer games, connect a camera module or have it be the brain in your home built drone. To get inspiration and guidelines, check out the project tutorials at www.raspberrypi.org/resources/make/ or follow our future posts as we build a system for monitoring and controlling your home in the spirit of Internet of Things.
